This guide helps you troubleshoot why your laptop isn’t charging despite being plugged in. Charging problems often stem from faulty power adapters, non-working power outlets, or defective batteries. If the hardware seems fine, resolving power issues usually involves updating your laptop’s power or battery management settings.
How to Fix a Laptop with a Non-Working Charge Port
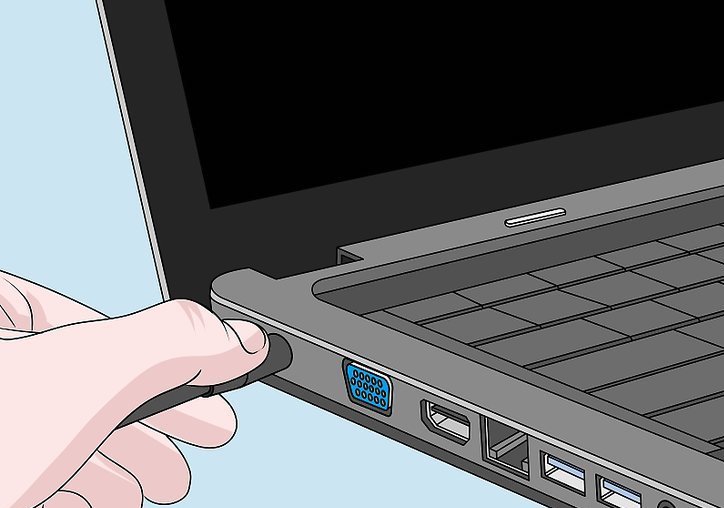
Begin by ensuring that the charging port has a solid connection with the adapter and charging brick. If everything looks good with the charging port and cable, examine the power jack on the laptop—a wobbly jack might indicate a problem.
Method 1: Troubleshooting the Hardware
- Try a Different Power Outlet
- Unplug your laptop and wait a few minutes before connecting it to an outlet in a different room. If it charges elsewhere, the issue lies with the power source, not your laptop or charger.
- To verify if the laptop is charging, look for charging indicators. Many laptops have a light to show if they’re receiving power. It might be above the keyboard, on the side, or at the back. Mac laptops with magnetic charging cables display a light at the cable’s end (orange = charging, green = fully charged). Charging lights can also appear on the power cord, especially if there’s a “brick” part.
- Inspect the Power Adapter
- Check the entire power cord for any signs of damage, such as tears, dents, or worn-out insulation. If you find any flaws, or if the power brick appears warped or smells burnt, the cord might be faulty.
- Take your laptop to a local repair shop and ask to use one of their working power adapters. If a functioning adapter charges your laptop, you might need to purchase a replacement.
- For newer PC models supporting USB-C charging (like the Huawei MateBook X), ensure the power adapter is plugged into the correct USB-C port on your laptop, as only one port might support charging.
- Check your warranty before replacing any parts, as the cost of the adapter might be covered.
- Examine the Power Jack on the Laptop
- When properly connected, the adapter should not jiggle or fall out of the power jack. A loose connection could mean a bent pin inside the jack or that the entire jack has loosened from the motherboard. Visit a repair shop for a proper diagnosis.
- Power jack issues are often model-specific. Look up your laptop model online for repair instructions, but note that repairs typically require purchasing a new power jack and soldering it onto the motherboard, which could void your warranty.
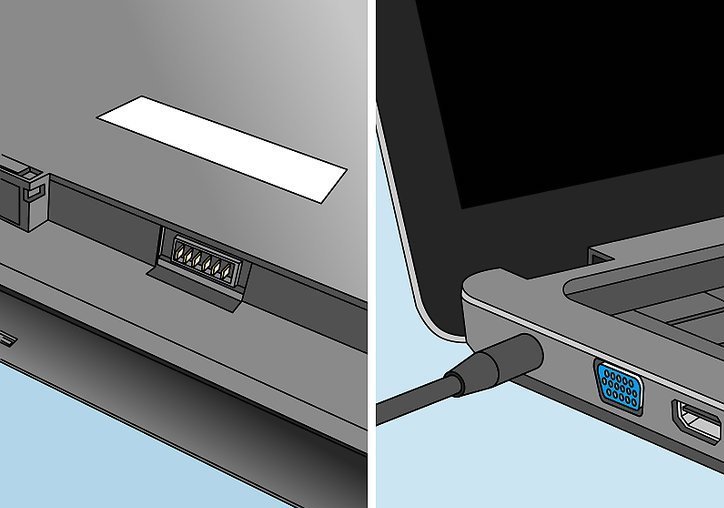
- Start the Laptop Without the Battery
- Shut down your laptop, remove the battery, and plug the computer in. If it powers on without the battery, you might need a new battery. Alternatively, another method might resolve the issue, or the battery could be dead and need replacement.
- If your laptop battery is non-removable, skip this step and try the subsequent methods before seeking professional repair.
Method 2: Checking Windows Power Settings
- Open Windows Settings
- Right-click the Start menu and select Settings.
- Access Power and Sleep Settings
- Click on Power and Sleep in the left panel. Windows lets you customize certain power and battery settings on your laptop. Sometimes, a low-battery alert might be overly sensitive and cause your PC to shut down prematurely.
- Review Screen and Sleep Menus
- Ensure the values under both “When plugged in” menus aren’t set too low.
- For instance, if the “Sleep” setting is set to 10 minutes under the “When plugged in” menu, the PC will turn off after 10 minutes of inactivity while plugged in. Increase that duration to prevent unexpected shutdowns.
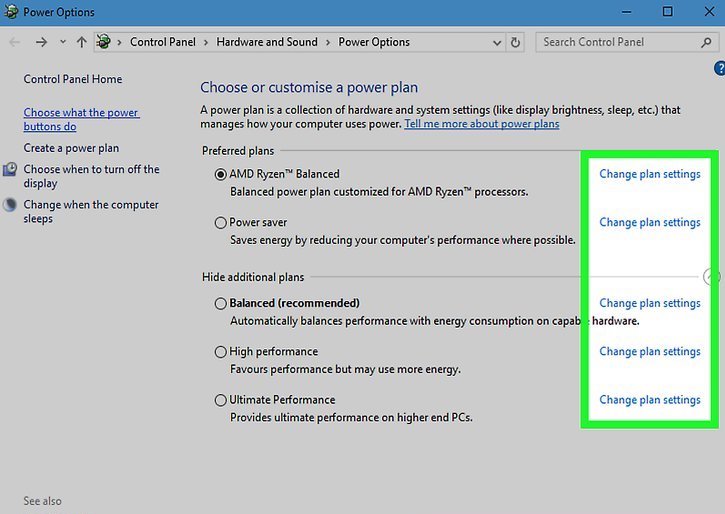
- Access Additional Power Settings
- Scroll down and click on Additional power settings to view your power plans.
- Modify Current Power Plan
- Click Change plan settings on your current plan. Ensure no settings are configured to shut down your PC unexpectedly.
- Adjust Advanced Power Settings
- Click Change advanced power settings at the bottom of the power plan.
- A quick way to rectify any issues is to click Restore plan defaults at the bottom-right of the dialog, though this will erase any custom power settings you’ve applied.
- Verify Battery Settings
- If you restored plan defaults in the previous step, skip to the next step. Otherwise, verify the following:
- Under “Critical Battery Action,” ensure Do nothing is selected for “Plugged in.” Otherwise, your computer might shut down at a certain battery level even if it’s plugged into a power source.
- Under “Low battery action,” also select Do nothing for “Plugged in.”
- If you restored plan defaults in the previous step, skip to the next step. Otherwise, verify the following:
- Save Changes
- Click OK to save your changes. Restart your PC to see if the issue is resolved. If not, proceed to the next step.
- Open Device Manager
- Right-click the Start button and select Device Manager from the menu.
- Update Battery Drivers
- Click Batteries to see a list of all battery-related drivers. There will usually be one entry for your AC adapter and another for the battery.
- Right-click the driver(s) and select Update driver. If there are two entries under Batteries, update them one by one. Follow any on-screen instructions to update the drivers if needed.
- Restart the Computer
- Shut down the computer and start it up again so the updated driver can take effect.
- Reinstall the Driver
- If you still cannot charge your laptop, go back to the Batteries section in Device Manager, right-click Microsoft ACPI-Compliant Control Method Battery, and select Uninstall.
- Once the process is complete, click the Action menu and select Scan for hardware changes. Restart your computer once the driver is reinstalled.
- This step requires an internet connection on your laptop.
Method 3: Checking Mac Power Settings
- Check for Software Updates
- Apple occasionally releases updates to help your computer function better with the power adapter. To check for updates, click the Apple menu, go to System Preferences, and select Update Now if an update is available.
- View Battery Health Status
- To check your battery condition, hold the ⌥ Option key while clicking the battery icon in the menu bar. The Battery Status menu will show one of the following indicators:
- Normal: The battery is functioning correctly.
- Replace soon: The battery is working normally but no longer at full capacity. Monitor the status frequently to ensure it doesn’t deteriorate.
- Replace now: The battery works but its capacity is significantly reduced. You can continue using the laptop with a power cable until you can replace the battery.
- Service Battery: The battery is not functioning properly. You can still use the computer with a power cord connected, but the battery likely won’t work independently. Take the computer to an Apple-authorized service provider as soon as possible.
- To check your battery condition, hold the ⌥ Option key while clicking the battery icon in the menu bar. The Battery Status menu will show one of the following indicators:
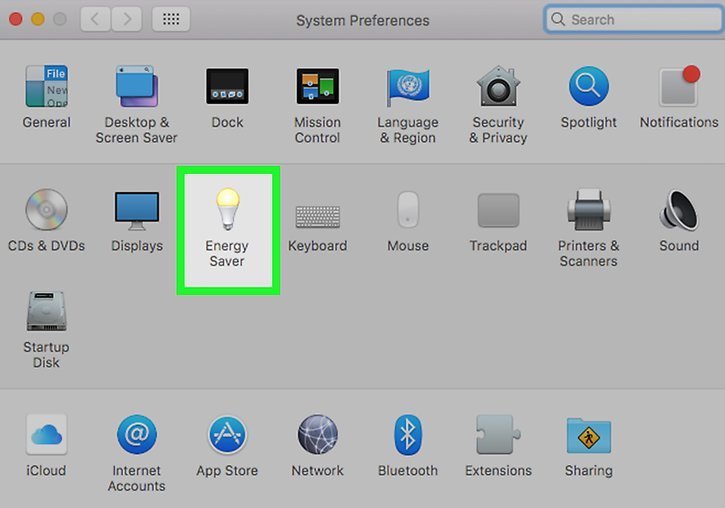
- Check Energy Saver Settings
- If your computer is turning off unexpectedly, it might be due to incorrect power settings. Go to the Apple menu, click System Preferences, select Energy Saver, and then Power Adapter to review what your computer is set to do when plugged in. Ensure the “Turn display off after” slider isn’t set to sleep after a brief period of inactivity.
- Shut Down Your Mac
- If issues persist, resetting the System Management Controller (SMC) might help resolve power problems. Start by ensuring the computer is turned off and unplugged from a power source.
- Plug the Power Adapter into the Mac
- Do not turn the computer on yet; simply plug it in.
- Reset the SMC
- Press and hold Control + ⇧ Shift + ⌥ Option and the Power button for about 4 seconds, then release the keys.
- Power On the Mac
- Press the Power button once to turn your Mac back on. The SMC will be reset, hopefully resolving any remaining power issues.