When you save a photo to your phone or computer, it’s often in JPEG format. If you need a PDF version, you can easily convert it using software already available on your device. Another quick option is to use Adobe’s free online JPG-to-PDF file converter.
How to Convert a JPG Image to a PDF
Here’s how to convert a JPG to a PDF on a PC, Mac, Android, iPhone, or iPad:
- Using Built-In Software
- PC/Mac: Use built-in applications like Preview (Mac) or Photos (PC) to export the image as a PDF.
- Android/iPhone/iPad: Use available apps such as Google Photos or Files to perform the conversion.
- Using Adobe’s Online Converter
- Visit Adobe’s free (adobe.com).
- Follow the prompts to upload your JPG file and convert it to a PDF.
Method 1: Converting Photos to PDF on Windows

- Open Your Photo in the Photos App. Double-click the photo to open it in the Photos app. If it opens in a different app, close the window, right-click the photo, select Open with, and choose Photos.
- To add multiple photos to the same PDF file:
- Windows 10: Click See all photos at the top-left of the Photos app, click Select at the top-right, and then click each photo you want to include.
- Windows 11: Click the two overlapping photos at the top-left corner of the Photos app, check the boxes on the images you want to include, right-click any of the selected photos, select Print, and then skip to Step 3.
- To add multiple photos to the same PDF file:
- Click the “Print” Icon. It’s a printer-shaped icon in the upper-right corner of the window.
- Select Microsoft Print to PDF. From the “Printer” drop-down menu at the top-left corner of the window, select Microsoft Print to PDF.
- If you selected multiple photos, each will be added to its own sheet in the file. Click the arrows above the preview in the right panel to see how each page will look.
- Click the Print Button. It’s at the bottom of the menu. This will open your file browser.
- Enter a Name for Your PDF File. Type a name for your PDF document into the “File name” text box near the bottom of the window. Use a relevant name to easily find it later.
- Select a Save Location. Click the folder where you want to save your PDF on the left side of the window. Choose a location that’s easy to find.
- Click Save. It’s in the bottom-right corner of the window. The photo(s) will now be saved as a PDF file.
Method 2: Converting Photos to PDF on macOS
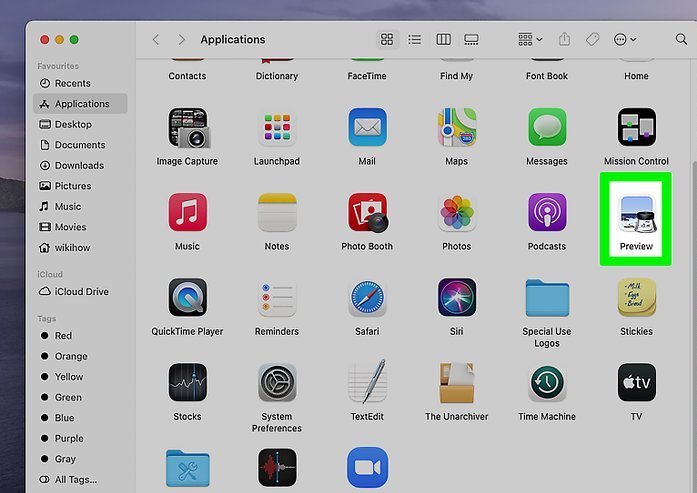
- Open Preview on Your Mac. You can find the Preview app on your Mac’s Dock, in the Applications folder, or by searching for “Preview” in Spotlight.
- Open the File Menu and Select Open. Click the File menu in the menu bar at the top-left corner of the screen, then select Open.
- Select the Image(s) You Want to Convert. To convert a single image, click it once to select it. To select multiple images, hold down the Command key and click each image name.
- Click the Open Button. It’s located at the bottom of the window. If you selected multiple photos, you can drag them up or down in the left sidebar to rearrange their order.
- Export as PDF. Click the File menu again and select Export as PDF, which is toward the bottom of the menu.
- Enter a Name for Your PDF File. Type a name for your PDF document in the “Save As” text box at the top of the window. Choose a relevant name for easy access later.
- Select a Save Location. From the “Where” drop-down menu, choose a folder (e.g., Desktop) to save your PDF document.
- Click the Save Button. It’s at the bottom of the window. The selected photo(s) will now be saved as a PDF file. If you selected multiple photos, they will be included in the same PDF on separate pages.
Method 3: Converting Photos to PDF on iPhone/iPad
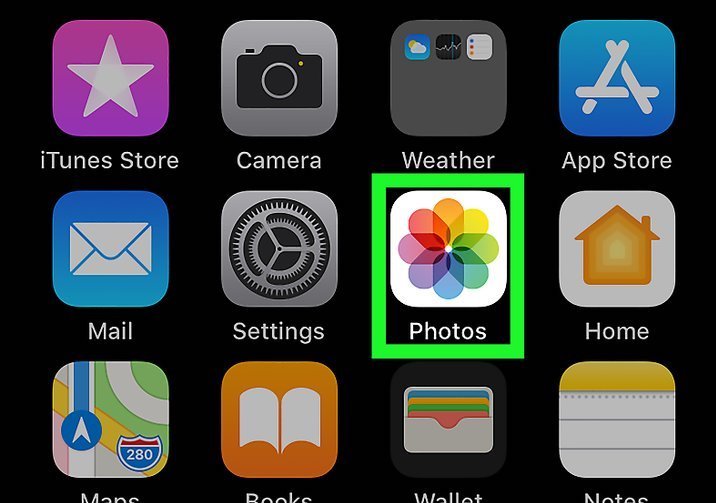
- Open the Photos App. Find the Photos app on your home screen or app library—it’s the multicolored flower labeled “Photos”.
- Select the Photo
- Tap and hold the photo you want to convert until a context menu expands.
- If converting multiple photos, tap Select at the top-right corner, choose the photos you want, and then tap the Share icon at the bottom-left corner. The photos will appear in the PDF in the order they’re selected.
- Tap Print. In the menu, select Print (toward the bottom). This will open the Printer Options screen.
- Zoom Out on the Photo Preview
- Place two fingers on the center of the photo preview and quickly pull them apart, as if zooming out. This action will enlarge the photo.
- For multiple photos, zoom out on the first photo preview.
- Tap the Share Icon
- It’s the box with an upward-pointing arrow at the top-right corner. This will expand your sharing options.
- At the top of this menu, you’ll see PDF Document below Photo.
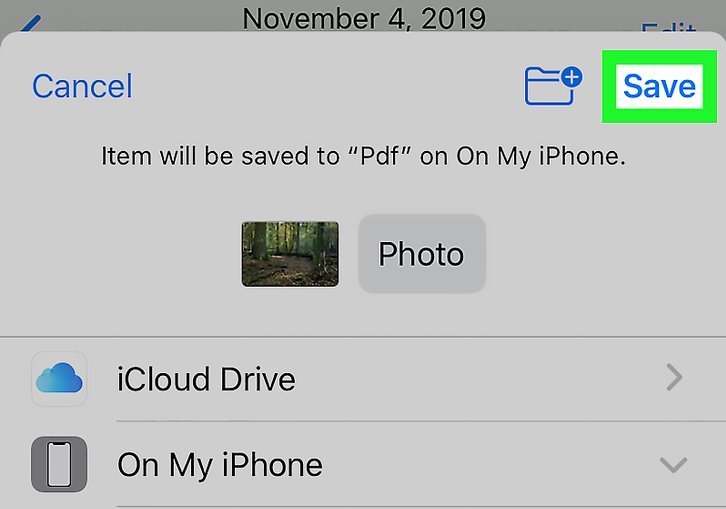
- Save to Files. Tap Save to Files (you may need to drag the menu upward to see this option). Choose a location to save the PDF.
- Select a Save Location and Save. For example, if saving to your iCloud Drive, select that option, and then a sub-folder if desired. Tap Save at the top-right corner to finalize the save.
Method 4: Converting Photos to PDF on Android
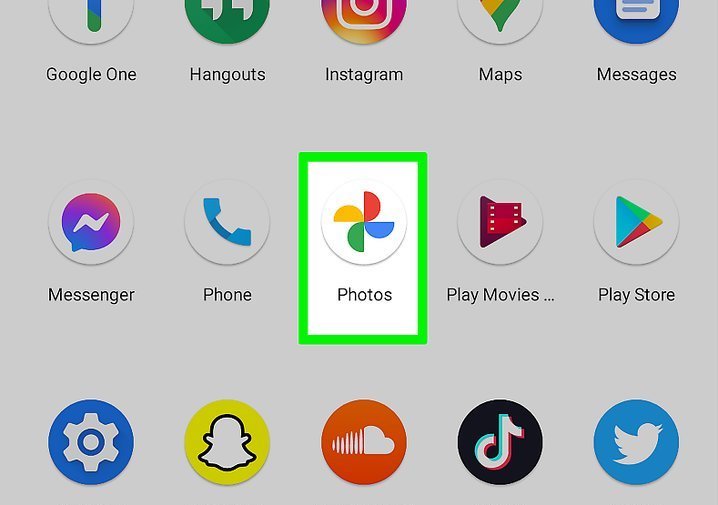
- Open Google Photos
- If you have the Google Photos app on your Android device, you can use it to easily convert any photo file, including JPEGs, into PDF format.
- Google Photos comes pre-installed on most Android devices. If you don’t have it, download it for free from the Play Store.
- Select the Photo. Tap the photo you want to convert. This will open a larger version.
- Open the Menu. Tap the three-dot menu (⋮) at the top-right corner.
- Tap Print. Select Print from the menu to open the Print dialog window.
- Choose Save as PDF. From the “Select a Printer” menu at the top-left corner, choose Save as PDF.
- Tap the PDF Icon. It’s the green icon labeled “PDF” in the upper-right corner. You’ll be prompted to enter a file name.
- Name the File and Save
- Enter a name for the PDF file that you’ll remember later.
- Tap Save to save the PDF to your Android device.
- Repeat these steps for any additional PDFs you need to save.
Method 5: Using Adobe’s JPG-to-PDF Converter
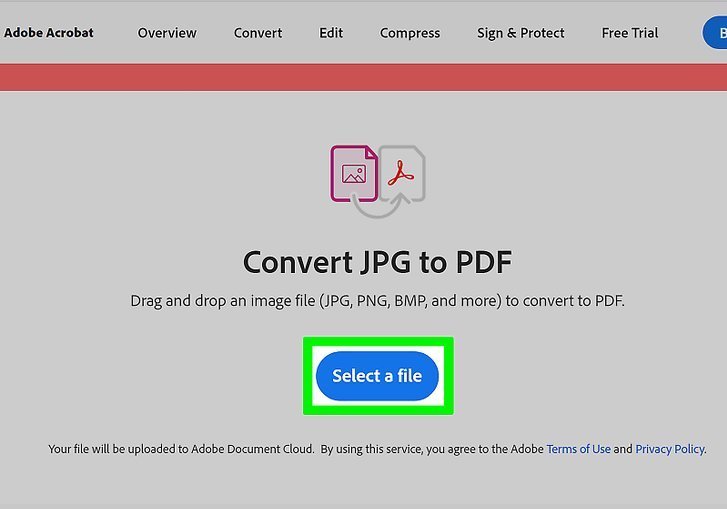
- Visit Adobe’s JPG-to-PDF Converter. Go to https://www.adobe.com/acrobat/online/jpg-to-pdf.html in a web browser. You can use this web-based tool on any computer, phone, or tablet.
- Select a File. Click the blue Select a file button at the center of the page.
- Upload the Image. Choose the image you want to convert and click Open. This will upload and convert the image to PDF.
- Download the PDF
- Click Download to save the PDF to your device.
- If prompted, tap Save