This guide explains how to transfer files from your Android phone to your Windows or Mac computer. You can send various types of data, such as images, videos, notes, contacts, and more. Transfers can be done wirelessly or with a USB cable. For large file transfers, it’s recommended to upload them to a cloud service like Google Drive and then download them to your computer from there.
Transferring Files from Android to PC or Mac
- You can transfer files from your Android device to a PC using a USB cable, Bluetooth, or wirelessly through Phone Link.
- For large file transfers, or as an alternative to USB and Bluetooth, upload your files to a cloud service, then download them to your computer.
Method 1: Android Phone to Windows PC via USB Cable
- Connect your Android to your computer with the screen unlocked. Unlock your screen, then use a USB cable to connect your Android to your Windows PC. Plug the USB end of your charger cable into one of your computer’s USB ports, then connect the other end to your Android. Ensure the USB cable supports data transfer, as not all cables have this feature. Some have a “trident” symbol, but not all do.
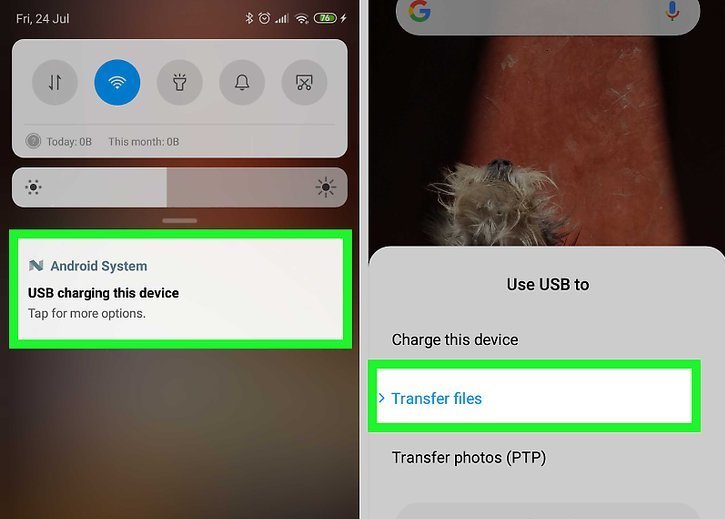
- Tap the “Charging this device via USB” notification (or similar) on your Android. This will open the “Use USB to” menu.
- If no option pops up, try swiping down from the top of your screen to check if the notification is hidden. If it’s not there, try a different USB port, as some Androids (and some cables) only recognize certain speed ports.
- If that doesn’t work, try a different USB cable and ensure airplane mode is off.
- Tap Transfer Files or File Transfer. The option will vary by device. This opens a file transfer window you can use to move files from your Android to the PC.
- Drag files from your Android to your computer. Once the file transfer window appears, you can drag files from your Android to the desired folder on your computer. Eject your Android and unplug it when finished.
- If the file transfer window does not open, proceed to the next step.
- Open File Explorer. If you couldn’t use the file transfer window, you can transfer files in File Explorer. Press Windows key + E or click the folder icon in the lower-left side of the Start menu.
- Navigate to your Android in File Explorer. Click This PC in the left panel, then double-click your Android.
- Select the file or folder you want to transfer. Most Androids require you to open a storage folder (e.g., “Internal”) to view files, and you may need to open additional folders. Double-click folders until you find the file you want to transfer. Click a file to select it, or hold down Ctrl to select multiple files.
- For Androids with removable storage, you’ll usually find most files in the “SD” or “Removable” folder rather than the “Internal” folder.
- Copy the file or folder. Press Ctrl+C to copy your selected file(s) or folder(s).
- Navigate to the desired location on your computer. In the File Explorer’s left-hand sidebar, click the folder on your computer (e.g., “Documents”) where you want to save the copied items.
- Paste the file or folder. Press Ctrl+V to paste. The copied item(s) will appear in the selected folder. Note that it may take some time for the files to finish copying, depending on their size.
- You can also reverse this process by copying a file or folder from your computer and pasting it into a folder on your Android’s internal storage.
Method 2: Android Phone to Windows PC via Phone Link
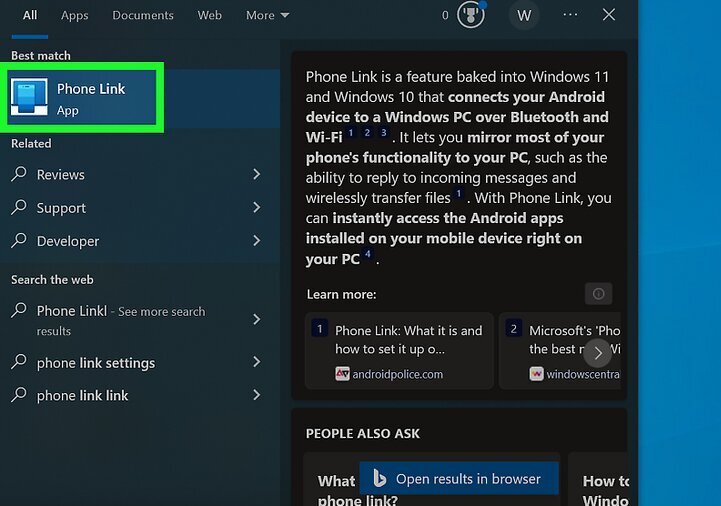
- Open Phone Link on your Windows 10 or 11 PC. A convenient way to move files from your Android to your Windows PC is by using Phone Link and the Link to Windows mobile app. To open Phone Link, type “phone link” into the Windows search bar and click on Phone Link.
- If prompted, log in to your Microsoft account.
- Install the Link to Windows app on your Android. Open a web browser on your phone, go to , and follow the on-screen instructions to download the app.
- Sign in to the Link to Windows app with your Microsoft account. Ensure you use the same Microsoft account that you used to log in to your Windows PC.
- On your computer, select “I have the Link to Windows app ready.” Click the checkbox to confirm.
- Click Pair with QR code. A QR code will appear on your screen.
- Scan the QR code with the Link to Windows phone app. Here’s how:
- On your phone, tap Link your phone and PC.
- When asked if the QR code is ready, tap Continue.
- Allow the app to access your camera if requested.
- Align the QR code in the camera viewfinder to scan.
- Follow the on-screen instructions and tap Done.
- On your Android, select the file you want to transfer. To transfer multiple files, open your Files or My Files app and select multiple files.
- Tap the Share button. This might look like a triangle with dots at each point or it may just say Share. If you’re in your file manager app, you may need to tap a menu first.
- Select Link to Windows – Send to PC. You’ll see this option in the system share drawer.
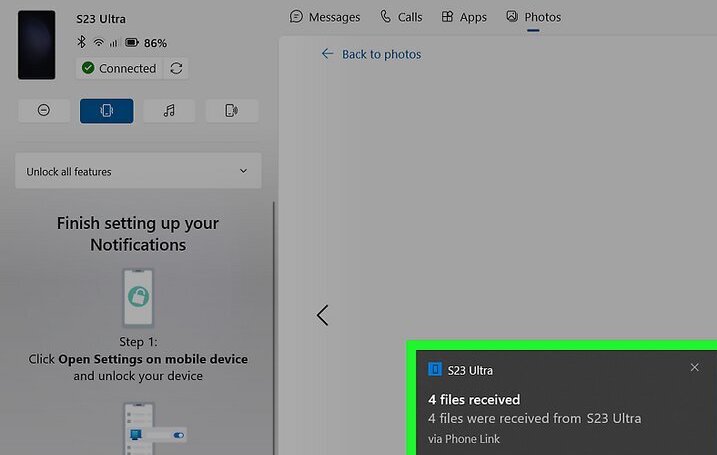
- Select your Windows PC to share the selected file(s). A notification will pop up in Phone Link on your computer, prompting you to open the file once the transfer is complete.
- Files are saved to your Downloads folder in a subfolder called “Phone Link.”
Method 3: Android Phone to Windows PC via Bluetooth
- Turn on your Android’s Bluetooth. Swipe down from the top of the screen. If Bluetooth is disabled, tap the Bluetooth icon to enable it.
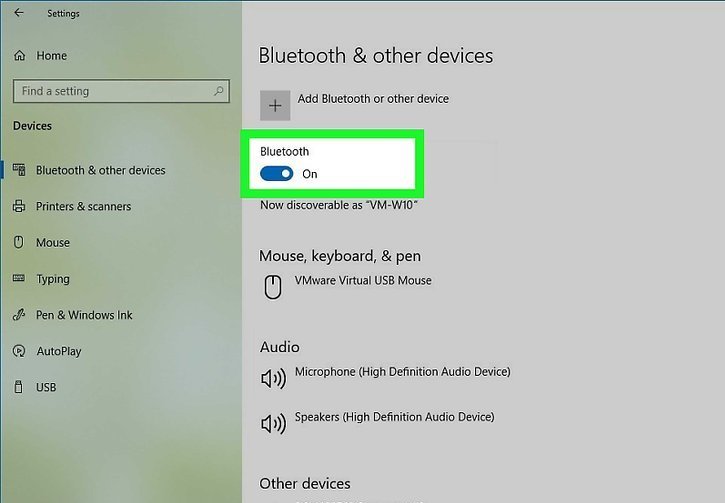
- Turn on your Windows computer’s Bluetooth.
- Open Start and select Settings.
- Click Devices (Windows 10) or Bluetooth & devices (Windows 11).
- If the Bluetooth switch is turned off, click it to turn it on.
- If the switch is already on, you don’t need to do anything further.
- Add your Android as a Bluetooth device.
- Click Add Bluetooth or other device (Windows 10) or + Add device (Windows 11).
- Select Bluetooth.
- Select your Android phone and click Pair.
- If prompted, click Yes to confirm the code.
- Click the Bluetooth icon. This blue icon is typically in the bottom-right corner of your computer’s screen. You may need to click the ^ icon to see it.
- Click Receive a File. This option is in the pop-up menu and will open a new window.
- Find the file you want to share from your Android. This could be a photo, video, or any other file. Use your Android’s file manager to browse internal files and those saved to your SD card.
- Select the file. Tap and hold the file to select it. If it’s a photo or video, you can simply tap it to open.
- Tap the menu button. In most cases, this will be a ⋮ or a ⋯ icon, though some Samsung Galaxy phones will have a MORE icon. A drop-down menu should appear.
- Tap the Share option. The appearance and name of this option may vary depending on your Android device.
- Select the Bluetooth option. The appearance of this option will also vary from one Android device to another.
- Select your computer’s name. Tap your computer’s name in the menu that appears.
- Click the confirmation message on your computer. If prompted to accept or decline the file transfer, click Yes.
- Once you confirm the transfer and specify a download location, the file will begin transferring to your computer.
- You can also send files to your Android by clicking Send a File in the Bluetooth pop-up menu, dragging the files into the transfer window, following the on-screen prompts, and then tapping Accept (or similar) on your Android when prompted.
Method 4: Android Phone to Mac via LocalSend
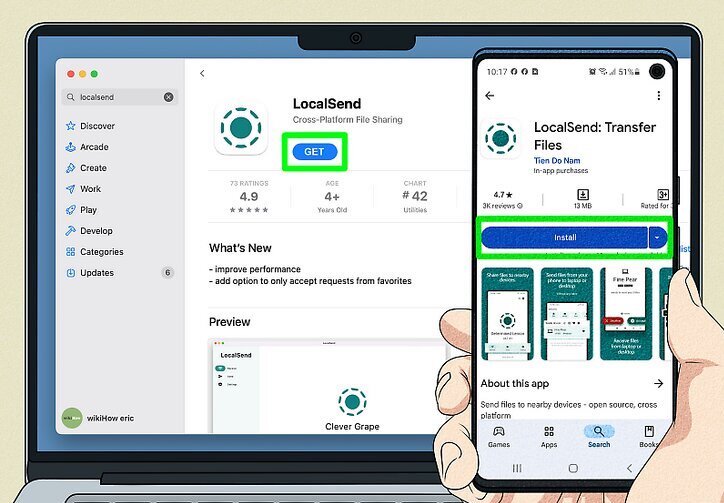
- Install LocalSend on your Mac and Android. Previously, transferring files from an Android to a Mac required a program called “Android File Transfer,” which is no longer available. Unfortunately, there’s no universally free way to connect your Android to your Mac for file transfers on all models, including M3 Macs. However, LocalSend is a free alternative that works similarly to AirDrop.
- On your Mac, you can find LocalSend on the Mac App Store.
- On your Android, LocalSend is available for free on the Play Store.
- Connect your Android and Mac to the same Wi-Fi network. Ensure that both your computer and phone are connected to the same Wi-Fi network to transfer files using LocalSend.
- Open LocalSend on your Android and tap the Send tab. This will allow you to browse your Android for files to transfer to your Mac.
- Select one or more files. To add more files, tap + Add. All selected files will appear at the top.
- Open LocalSend on your Mac. Once LocalSend is open on both devices, your Mac should appear in the “Nearby devices” list on your Android.
- LocalSend assigns random names like “Wacky Cucumber” and “Bold Elephant” to devices, so don’t be alarmed.
- Select your Mac in LocalSend. Once selected, you’ll be prompted to accept the files on your Mac.
- Follow the on-screen instructions on your Mac to receive the files. The files you transferred from your phone will be available in your Mac’s default download folder.